So from the last Watercolor 101 blog post, you’ve seen some of the different materials used in watercolor painting. What now? Now, you need to learn more about colors and how to mix them to achieve the hue you desire.
For basics, you can survive with just 3 colors – red, yellow, and blue. Other colors can be added to achieve different effects, like warm and cool toned reds produce different tones of oranges and violets.
In this demonstration, I am using a basic 8-color Prang Watercolor Set. I only used the red, yellow, and blue to demonstrate color mixing. Here are 3 simple steps to make your own color matrix:
Step 1: Wet your brush, load it up with a lot of water.
Step 2: Dip your brush into the pan/cake sideways with the body of the brush hairs touching the paint and not the tip. You don’t want to ruin the shape of the brush.
Step 3: Swatch away, lay down the paint on the paper. Play around with the colors, and start mixing them.
Shown in the image below, is a very simple color matrix.
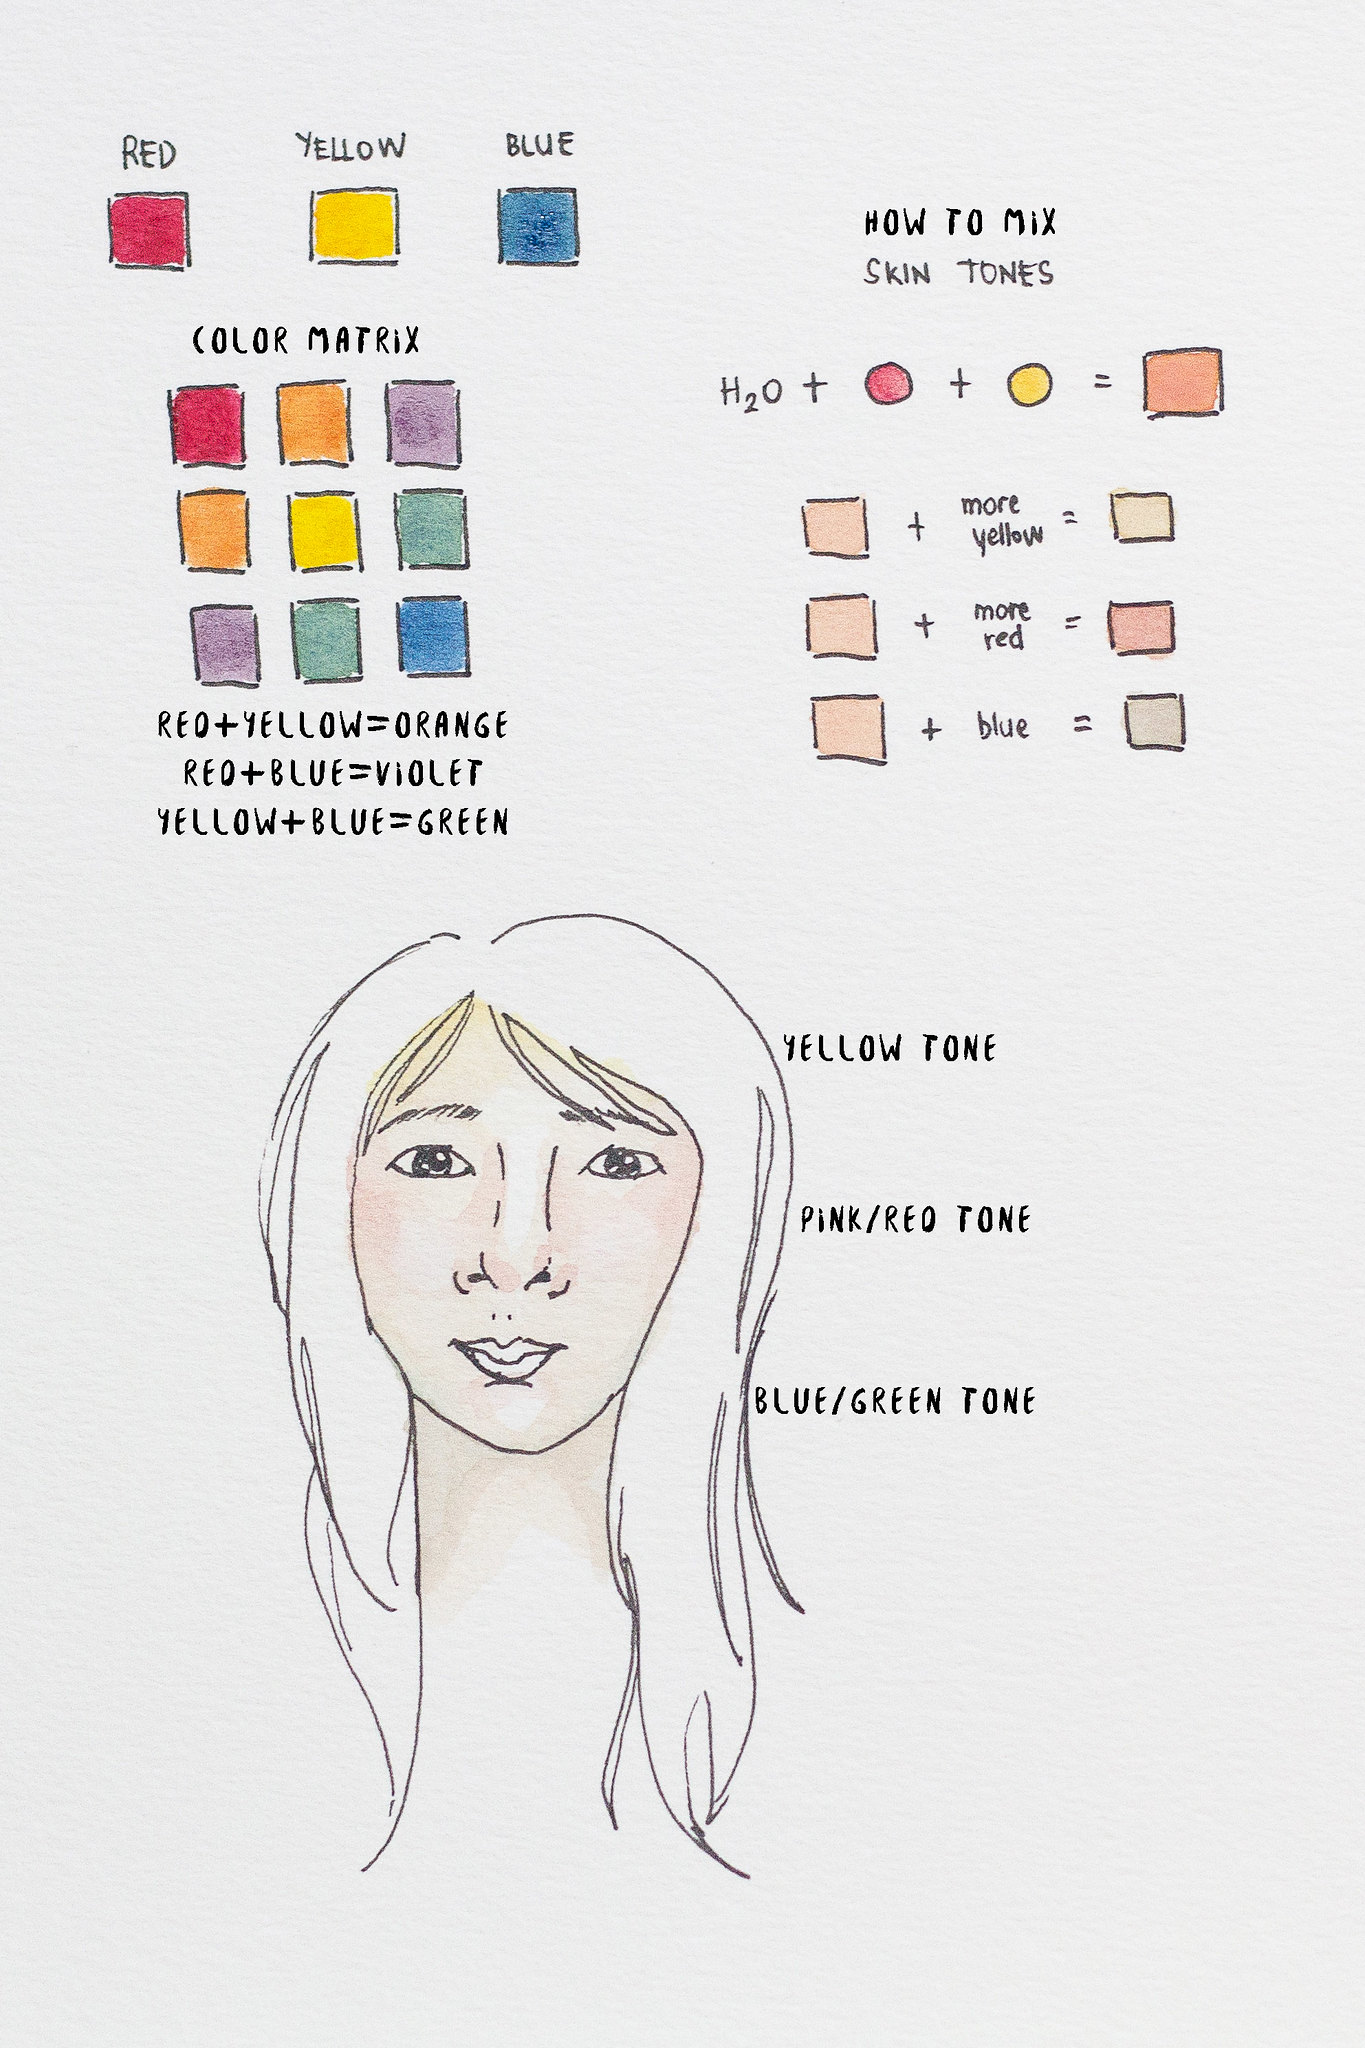
Since I enjoy painting faces or portraits, I have made a little guide in the image above regarding mixing colors to achieve skin tones. Some people suggest using white paint in order to achieve flesh tones, but I think it’s not entirely necessary. All you need is yellow, red, and lots of water. First mix equal parts of red and yellow, next add water to tone it down into an almost translucent flesh tone. You can also opt to use opera or permanent rose as your red, and cadmium yellow as your yellow base. Remember, if you add more water it will lighten the color. So in essence, you don’t really need that white paint.
Next, you can adjust the skin tone depending on how yellow, pink/red, or olive you want it to be. Add more yellow, add more red, or add more blue paint, as seen in the image above.
Personally I don’t paint faces in just a single flesh color all over, it looks unnatural to me. As such, I follow a simple rule. The forehead part of the face tends to have a more yellow tinge to it. The middle part, most especially around the nose and the cheeks, will have a more rosy hue to it. I also sometimes put on a little blush on the chin. Lastly, the around the mouth and chin will have a more cool tone. I suggest mixing a little green/blue into the flesh tone. Moreover, parts of the face where the skin is stretched due to the bones underneath, like a sharp chin or jaw line will appear to have a green hue along it.
Lastly, if you want to create shadows/greys, you can always mix blue into the flesh tones.
There you have it, a quick tutorial on how to mix colors and on making skin tones. Hope you learned something new today. Just keep on practicing, and enjoy painting!
Materials used:
- Prang 8-color Watercolor Set
- Canson Watercolor Paper
- Pentel Waterbrush
